You can produce professional video without being a professional video producer
By Larry Bangert
Producing a professional video can be a daunting task; you’re not a video professional, but you want a professional-looking result. You can do it.
One key to success is understanding the phases of a video’s creation: pre-production, production and post-production.

Think of it like baking. Many ingredients need to go into your bread, cake, or pastry and they all need to be blended in just the right way. The same is true for your professional video.
Pre-production – A chef uses a recipe to plan and prepare. The recipe contains all of the details needed to create the desired end product. Your script will also detail the elements needed to create the desired end product.
Production – the chef acquires all of the elements, or ingredients that will be needed, just like you and/or your producer will for your video. Shooting video, recording audio (voice-over) and gathering other assets are part of the production process.
Post-production – the chef combines all of the acquired ingredients to create a great result. Similarly, your editor will blend your footage, graphics, branding elements and other assets to create the perfect video result.
It’s not quite as easy as that. But the following tips can help you come up with a great video result.
PRE-PRODUCTION – Preparing for production
 Pre-Production is the most important aspect of your video’s creation. You should understand, and value, the processes that ensure video success. The more time and effort you put into your pre-production, the greater your chance of creating an effective video. Here are some specific pre-production tips:
1. Develop a complete concept for your video
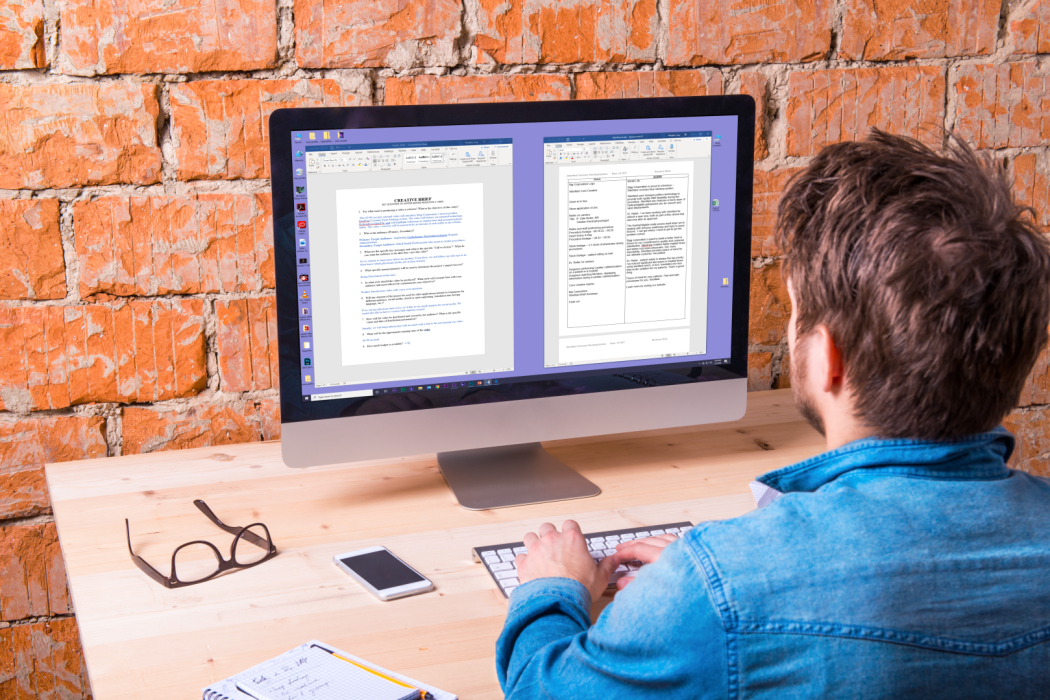
You need a tangible starting point, a document that lays the groundwork for your video. This is often called a Creative Brief, or Production, Brief. You can use the Creative Brief, found in the Downloads tab, to work through some of the important, early concept-related details including:
Objective – why are you making this video? What’s your goal? Your video objective should summarize, in a sentence or two, what you want to accomplish with your video. It should be specific, attainable and measurable. A strong objective will keep you focused on the intent of the video and prevent script-creep. Once you’ve defined an objective, avoid straying from it and certainly avoid adding to it; it is meant to confine you. You may find that you communicate more by communicating less.
Audience – who is your audience? Who will watch your video and why will they care about your message?
Deliverable – how will your video be viewed? How should your video be encoded for playback? A video deliverable is comprised of resolution, file type, data rate and file size. You can learn more by watching this video.
Format/Style – decide what format will most effectively help you to tell your story (your objective) to your audience. Will your video be a product introduction/explainer video? A customer testimonial? Manufacturing tour video? Maybe a panel discussion?
Budget – what’s the cost? What’s the value? Creating a professional video costs money. However, it also provides tremendous value. Think about the cost vs. the value as you determine which line items are worth the extra spend. Is it worth the money to hire a stylist? Maybe. Is it worth the money to hire a professional video production crew? Definitely! There is a budgeting checklist, found in the Downloads tab, that will help identify where your budget dollars could go.
2. Write a great script
Your script is the most important part of your pre-production. It will guide your production and propel your post-production. The following tips will help you as you begin the scripting process:
A common video script style is called an A/V (audio/visual) split style script – An A/V script enables you to accurately document what your viewer will see AND hear during your video. You can download and use an A/V script by downloading the Video Script Template, found in the Downloads tab.
When it is completed, it will look similar to the final script shown below.
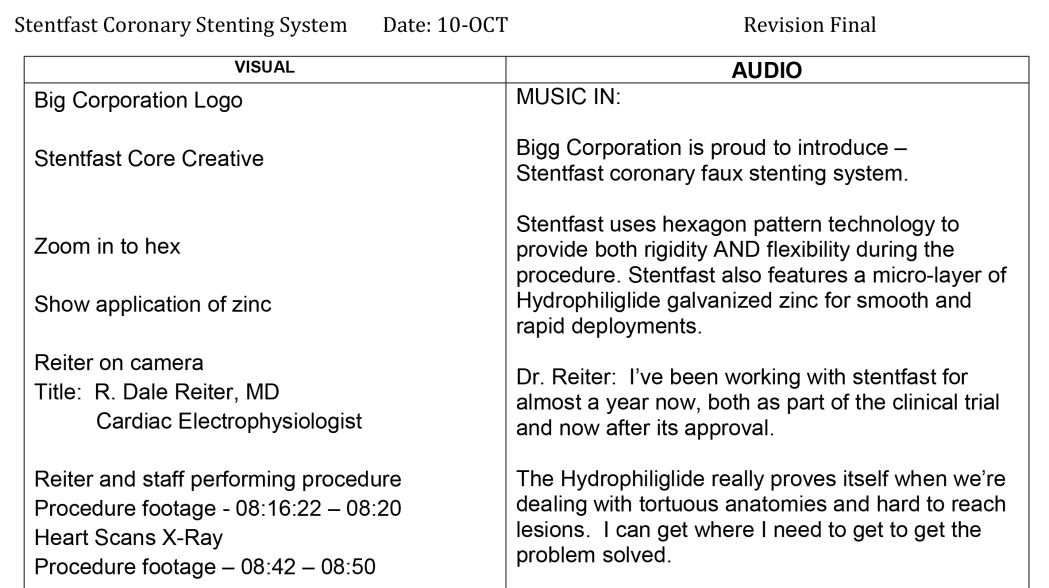
A portion of a final script, showing how the audio and visual side are used.
Write for the ear, not the eye. Your viewers won’t be reading your content, they will watching and listening to it.
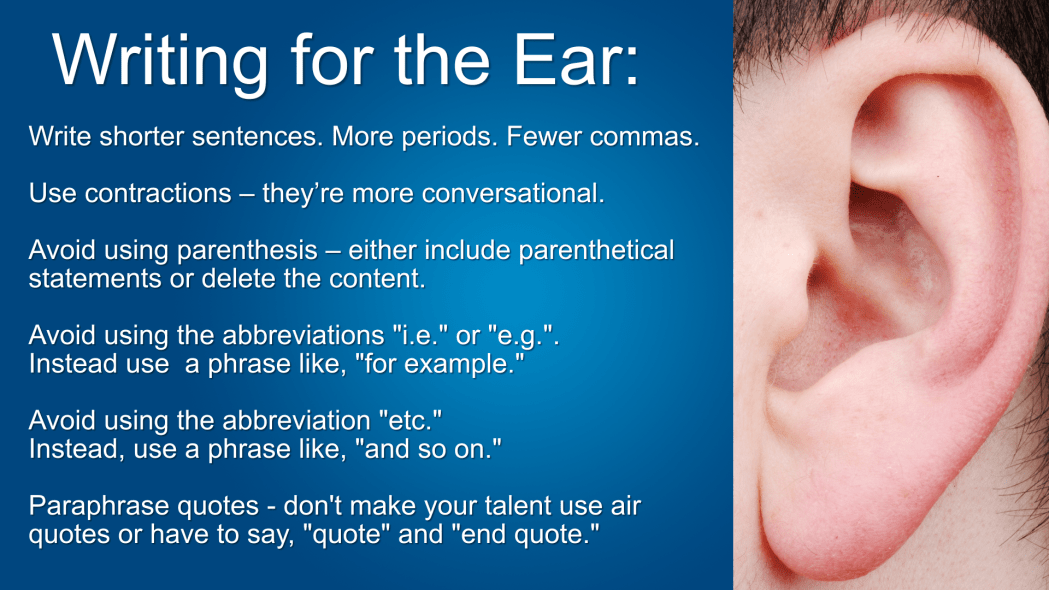
Include phonetic (fah-NET-ik) spelling for words/terms that are difficult to pronounce.
Double-check your spelling.
Avoid mid-sentence page breaks.
When your script is complete, read it aloud – you will immediately hear the issues you need to fix like run-on sentences, incomplete sentences and grammatical errors.
Read your script aloud again! It’s that important. The more you read it aloud, the more opportunity you have to strengthen you content before the camera’s rolling.
3. If not a script, create a detailed storyboard
Sometimes, an A/V script isn’t the best tool to use. For example, videos with no voice-over are difficult to script. In these cases create a storyboard. Storyboards also work well when you want to articulate, or depict, your vision for a specific animated effect for your editor.
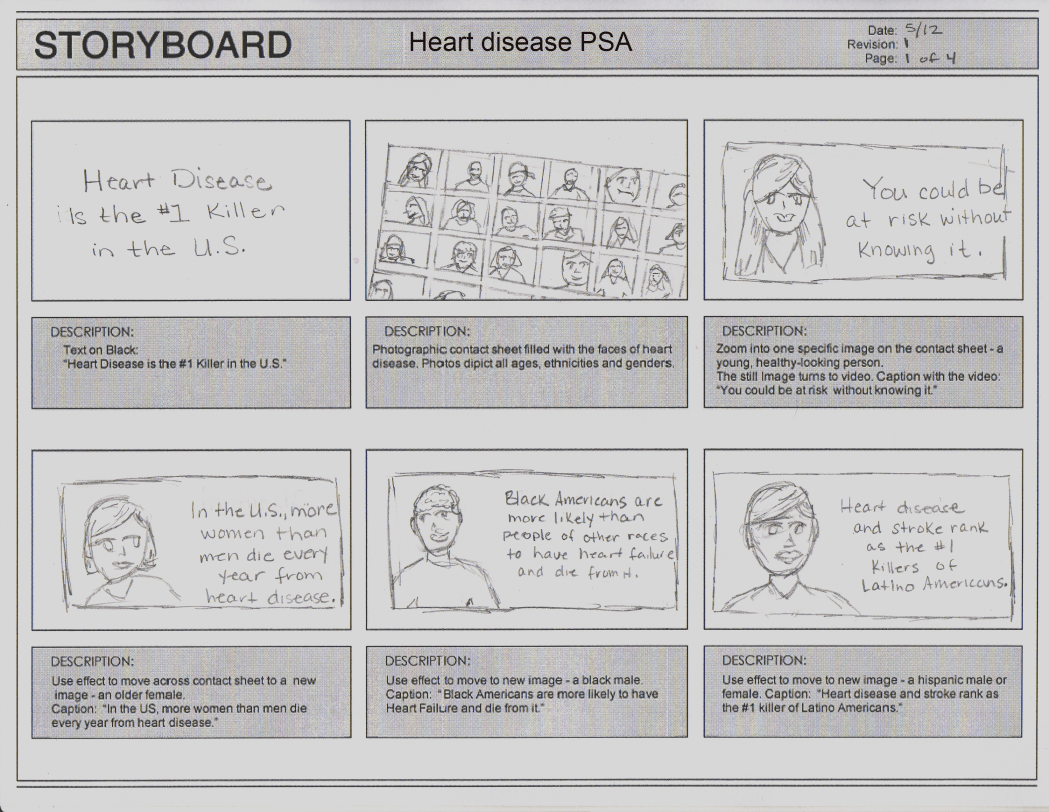
A six-pane storyboard
Use the Storyboard Template, found in the Downloads section, to begin story-boarding your show.
Another helpful story-boarding tool is PowerPoint. PowerPoint can be used to effectively create the same sort of “panes” as a manually drawn storyboards and you can add photos and video to help convey your intent.
4. Think about your shooting location now
Pre-production is the perfect time to be thinking about how, and where, you will be shooting your video. What are the minimum room/space requirements for your shoot? Are specific accommodations needed for the cast or crew? What other logistics need to be considered before scheduling a shoot? Use the Location Scouting Checklist, found in the Downloads tab, to begin thinking about your specific shooting requirements.
PRODUCTION – executing on your pre-production
Production can be the most exciting, and stressful, part of your video’s creation. It can be thrilling to watch your vision evolving into reality. But, if you’re not ready to execute on your pre-production, the results can be less than thrilling. The following tips will help you during the production phase.
5. Make sure your script is final and approved
A final and approved script ensures shooting success the first time. Not having a final and approved script can result in re-shoots which cause additional cost, potential continuity issues and delays in the final video. Maybe now is a good time to read your script aloud?
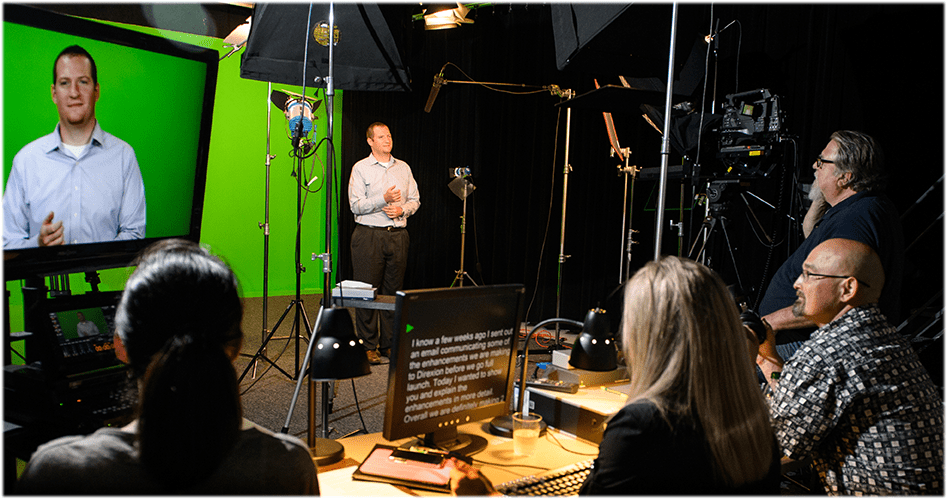
6. Hire a great crew
Search the internet, talk to others who have created videos, watch a lot of sample videos. The key here is to hire a professional – someone who has professional quality camera equipment and experience shooting videos. You may need a large complex crew of professionals or just a video “guy.” But, if you want a great video result, it should be shot by professionals.
Consider the following equation when thinking about a “professional” video person: Professional = Video experience + professional gear + proven creativity.
If you’re unsure or uneasy about hire a video production crew, consider using a video crew booking agency. They have access to high quality production people. See the Links section for access to video booking agencies.
7. Have all of your paperwork in order
There are a number of documents that will protect you (your company) and ensure that your company owns all the elements of the project:
Video Consent Form, found in the Downloads tab. Any person appearing on camera should sign this form. It ensures that you are using them with their permission.
Non-Disclosure Agreement (NDA) also sometimes called a Confidentiality Agreement (CA), is a document signed by all cast and crew members, which ensures the secrecy of proprietary or embargoed company information. An example of a Non-Disclosure Agreement can be found in the Downloads tab.
Work-For-Hire Agreement states that you (your company) own any assets (documents, files, footage etc.) obtained or created for your show. This also ensures that all of the project assets will/should be given to you (your company) at the conclusion of the project. A Work-for-Hire Agreement can be found in the Downloads section of this site.
8. Shoot it right the first time
“We’ll fix it in post,” means a mistake was made during the shoot that will have to be corrected as part of the editing process. But you can’t always “fix it in post”. If there’s an issue with a scene, take the time to try to find the best solution during production instead of shifting the problem to post-production. Ultimately, though, many problems found during production could have been prevented during pre-production. Have you read your script aloud yet?
9. When in doubt, shoot it
It’s better to have footage (or audio) that you don’t need than it is to need footage (or audio) that you don’t have.
POST-PRODUCTION – realizing the end result
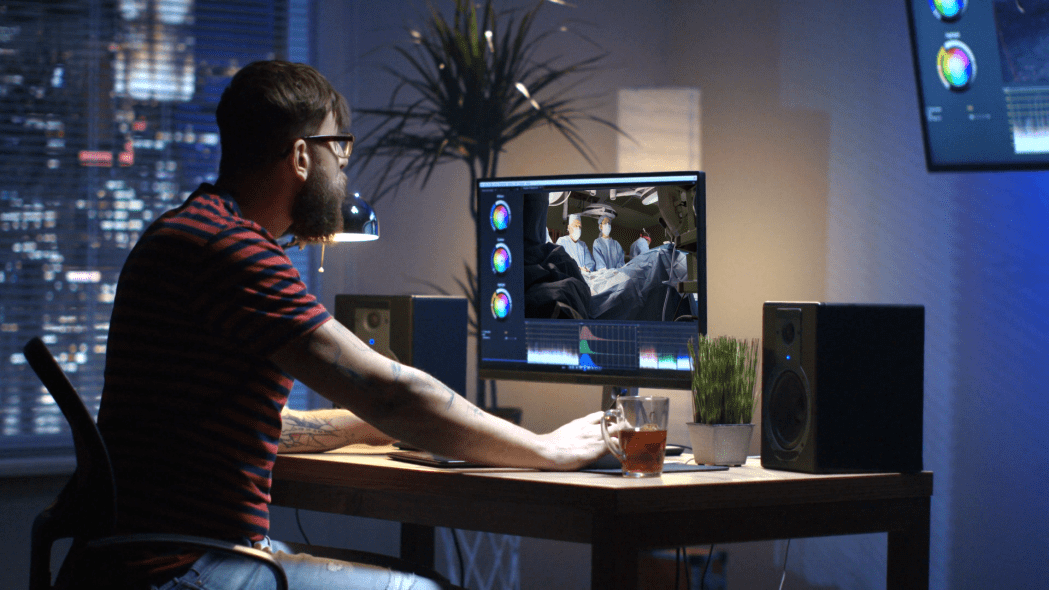
10. Hire a great editor
A great editor can transform a good video into a great video.
Search the internet, talk to others, watch a lot of demo reels but, most importantly, make sure you like your editor. Collaboration shouldn’t cause conflict.
Show your final, approved script to potential editors. The best editors will understand what you want and, ideally, have a couple of initial ideas that can strengthen your show.
Find an editor who is proficient using Adobe After Effects. AE is the industry-standard animated graphics software application.
11. Provide assets in the best possible quality
Make sure your editor has everything needed to get the job done. This includes the final script, shooting log or edit notes from the shoot, logos and word-marks, animations, video, photos, illustrations legal/regulatory information, copyright statement and/or applicable PowerPoint decks.
Bigger is better. For best results, make sure that any videos or graphics (charts, illustrations, photos, etc.) are the same resolution as your final video, or larger. For example, if your final video’s resolution will be 1920×1080 your videos and graphics should all be at least that size. The Deliverables video explains video resolution in more detail.

This image shows how a native 640×480 image looks when it’s resized to fit 1920×1080 space.
Layered files are better than flattened file – a layered file, like a core-creative image using Adobe Photoshop, will give your editor a ton of information. Having the ability to turn off on on specific layers of an image enable the editor to use (animate) those layers independently.
PowerPoint slides – If you want to use slides as graphics in your video, create your slide deck as a custom slide deck and use the measurements 20 inches wide by 11.25 inches high. When exported, these dimensions will translate into an image that has a resolution of 1920×1080.
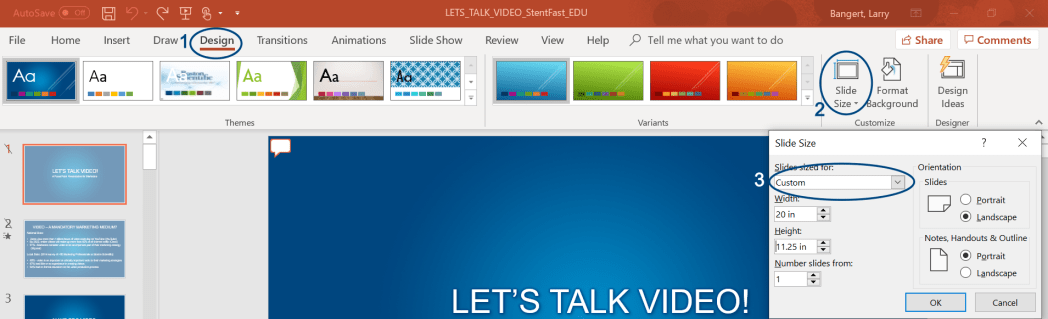
In PowerPoint, 1-Click Design, 2- Slide Size, 3-Click on Custom drop-down. Width=20 Height-11.25
12. Expect your rough cut to look rough
A rough cut version of your video is the bare-bones, first-pass, early look at your video. It’s only meant to provide a glimpse of how the final, polished video will look. You can view a rough cut video in the Video Examples area of this site.
13. Revise efficiently
Be efficient with your change requests. Often, an editing price assumes a rough cut, 2-3 revision edits and then the final version. Try to get all of your changes made in 2-3 versions.
14. Make sure your video is ready to be “baked”
Many ingredients need to be combined in just the right amounts to create a perfect loaf of bread. However, once the bread is baked, it’s impossible to change any of those ingredients because it’s now just bread. For video, the baking process is called encoding. Once a video is encoded, it becomes one layer of video and audio. Changes can be harder to make without going back to the original assets and project files, and then re-encoding. Study your video to make sure every detail is exactly how you want it before the final encoding process happens.
15. Own your assets
Once your video is approved, final and delivered, provide an external drive to your editor so he/she can give you a copy of all the original project files. The project files are good to have because they enable you to go back into your show, as editable layers, so you can make changes re-bake.
16. Understand the industry terms
You can find many of words and terms used in the pre-production, production and post production of your video in the Downloads section of this site.

Ultimately, if you thoroughly plan for your video (pre-production), execute on that well-planned pre-production (production) and work with your editor by providing the best quality assets, (post-production), your video has the best chance of looking great.
Good luck with your pro video!
Contact and About
Updated 12/19/2020
